Plant-Based Pie Crust.
Hey everyone, it is Jim, welcome to our recipe page. Today, I'm gonna show you how to prepare a special dish, plant-based pie crust. One of my favorites. This time, I am going to make it a bit unique. This is gonna smell and look delicious.
Plant-Based Pie Crust is one of the most popular of recent trending foods in the world. It's enjoyed by millions daily. It is simple, it's quick, it tastes delicious. They're fine and they look fantastic. Plant-Based Pie Crust is something which I've loved my entire life.
To get started with this recipe, we have to first prepare a few ingredients. You can cook plant-based pie crust using 9 ingredients and 9 steps. Here is how you can achieve that.
The ingredients needed to make Plant-Based Pie Crust:
- {Prepare 2 1/2 cups of whole wheat pastry flour.
- {Take 3/4 cup of ice-cold water.
- {Make ready 2 sticks of Earth Balance dairy-free butter, cubed and chilled.
- {Make ready 1 tablespoon of ground flaxseed.
- {Make ready 1 tablespoon of nutritional yeast (optional).
- {Get 1 teaspoon of sugar.
- {Make ready 1 teaspoon of salt.
- {Prepare of room temperature water for brushing or egg-wash if preferred.
- {Take 1-2 of deep dish 9" pie pans, buttered and floured.
Steps to make Plant-Based Pie Crust:
- Sift and thoroughly combine the dry ingredients together in a large mixing bowl. This can be done by hand with a whisk or large spoon, or in a mixer on low, if preferred..
- Add the cold butter cubes to the flour mixture. Break down and combine using a pastry cutter or fork until the butter is pea-sized and blending with flour..
- Add in cold water a couple of tbsp at a time (I normally end up using 6-12 tbsp depending on how many batches I am making). If you have an electronic mixer you can use the dough hook attachment for this next part. If not, your clean and floured hands will do. Work the dough, firmly pushing and folding until butter is melded completely and the dough holds together in the bowl. If it is wet and sticky, add more flour as needed. If it is too dry and crumbly, add more water as needed. Don't overmix!.
- Once the kneaded dough is able to form a cohesive and stable ball inside the bowl, cut evenly in half, and transfer bowl to the freezer to let dough rest and firm as you work on your desired filling..
- When ready to assemble your pie, remove dough from freezer. Lightly flour a clean flat surface on your counter. Using a floured rolling pin, take 1/2 of the dough and gently yet firmly roll out and stretch the dough until it is evenly flat and can cover the size of the desired dish..
- Carefully lay your rolled-out dough inside the crust pan, letting the excess drape over the sides. Use the tips of your fingers to firmly press the sides and bottom into the pan. Take a fork and lightly poke holes in the crust for ventilation. Pinch and twist the edges for desired crust design..
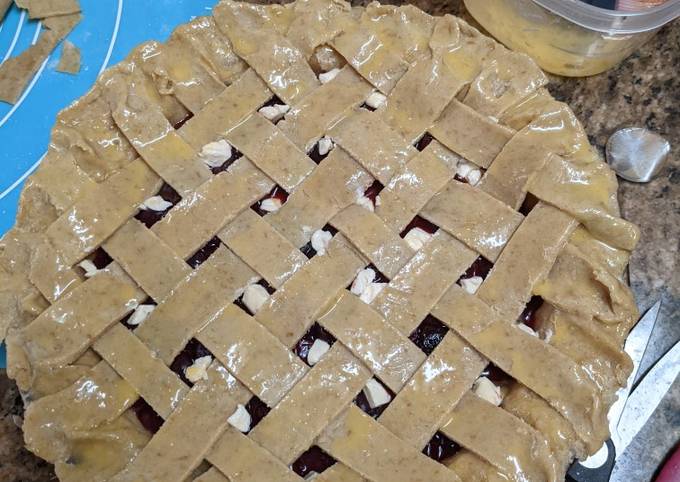
- Pour or spoon chosen filling over the bottom crust and smooth evenly. Roll out the second half of the pie dough as you did the first. Design top crust as desired (picture shows a lattice over a fruit filling), and gently puncture or slice small lines into the top with a fork or butter knife to ventilate, if needed for full top crusts..
- Trim excess dough hanging over sides, and pinch edges into place. Brush with room temperature water or egg wash (whisked egg + dash of milk of choice), if preferred..
- If using a particular filling recipe, cover the edges of the crust with foil to protect it from burning, and bake as instructed!.
So that is going to wrap it up with this exceptional food plant-based pie crust recipe. Thank you very much for reading. I am confident that you will make this at home. There's gonna be more interesting food in home recipes coming up. Don't forget to bookmark this page on your browser, and share it to your family, friends and colleague. Thank you for reading. Go on get cooking!


0 comments:
Post a Comment